Flink-ESB Message Gateway Tutorials
Use case: using black lists and white lists to protect services in Flink-ESB Message Gateway
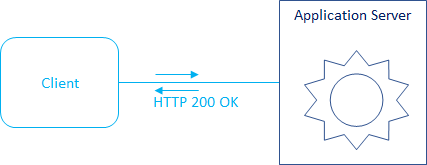
Original situation: there is one or multiple services available.
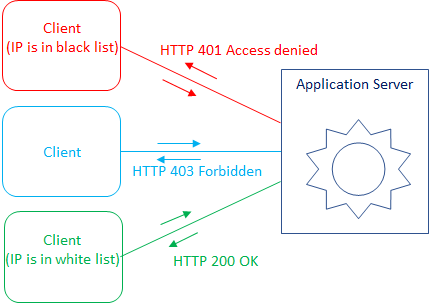
Objective: add a black list, containing IP addresses or any other properties of the callers, who should be denied accessing the services. And/or create a white list of the callers, who should be able to call the services. All others' requests should be rejected.
The other use case could be: to forward requests based on the caller's IP to different services. For example, white listed should go to the quickest service, blacklisted - to the slower service.
Estimated costs:
Programming efforts: 0
Administrator efforts: 15 minutes
For this tutorial a service is used, created in the Message Gateway: adding REST API to SOAP services tutorial.
Of course, you can use any other service for this tutorial.
Step 1: defining validation rule to check IP of the caller in Flink-ESB Message Gateway Config Console
 Open Flink-ESB Message Gateway Config Console in the browser. Default URL: https://localhost:8082. Login with default username/password: admin/admin
 Click on "Validation Rules" tab. Enter data as on the picture below: "Rule Id" : 1001 (or any unique Id), "Rule Type" : CUSTOM, "Expression or Filename" : !([ '192.168.2.116' ].contains(property['remote.address'])) (ajust IP of black listed machine accordingly), "Exception Message" : 'This IP is in black list'.
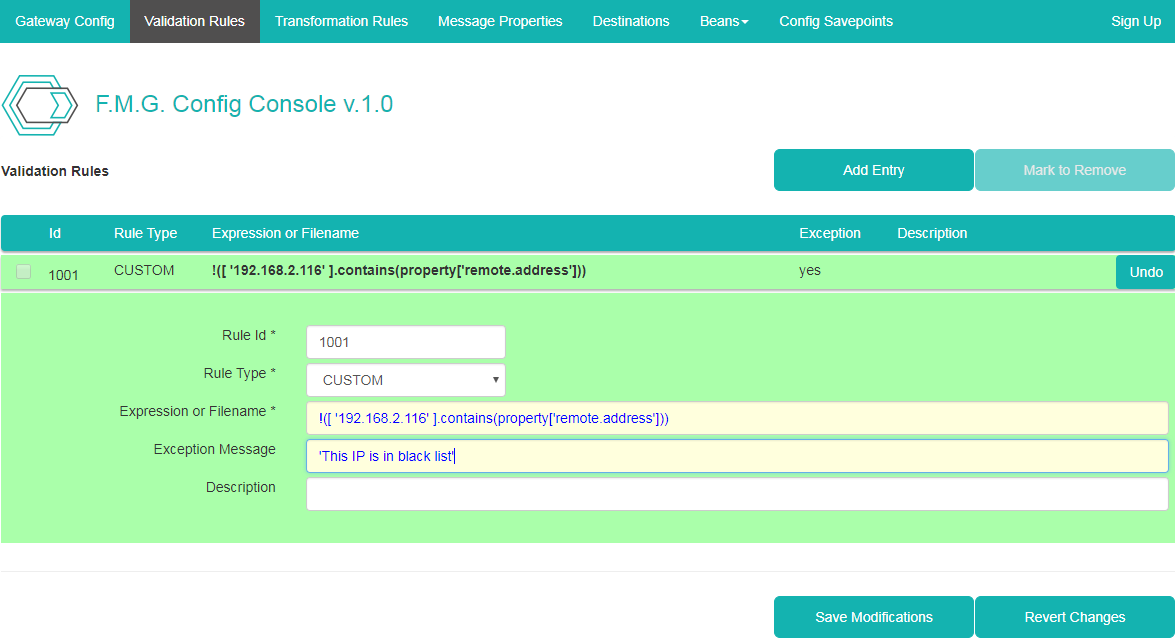
 Click "Save Modifications" to save a validation rule.
Step 2: assigning validation rule to façade entry in Flink-ESB Message Gateway Config Console
 Click on "Gateway Config" tab and click on the row with "Config Id" 1001 (or whatever Id you've assigned to façade entry with URI /service/country/info/{country}) to unhide details panel.
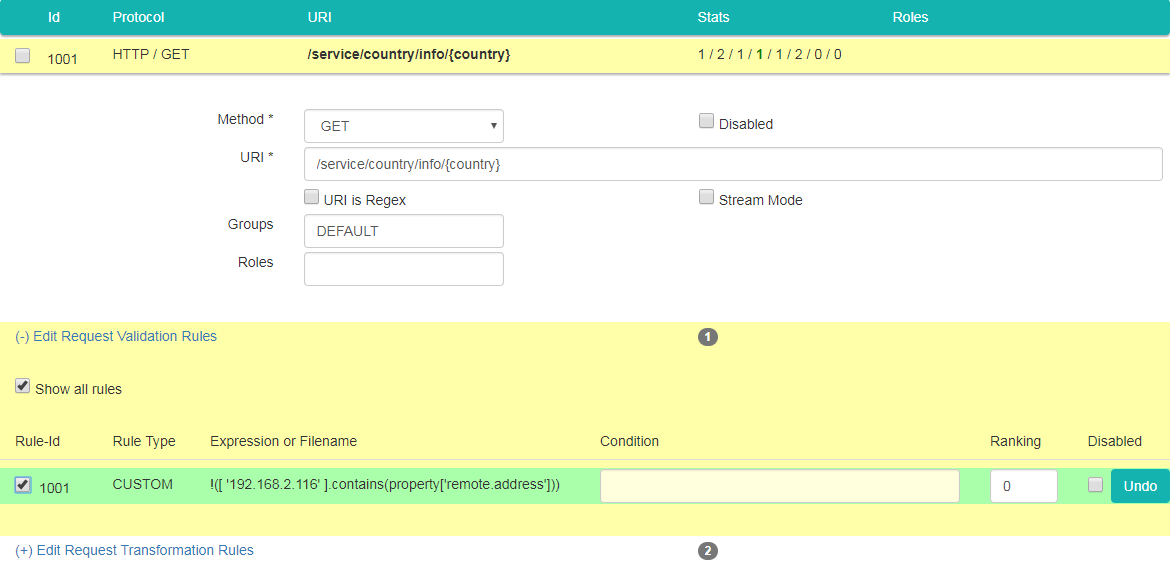
 Click on "Edit Request Validation Rules" link, select "Show all rules" checkbox and select a checkbox on the left side of rule with Id 1001 (or whatever Id you've assigned to a rule in the previous step).
 The data should look like on picture below:
 Now click "Save Modifications" to save changes.
Step 3: posting configuration to the running instances of Flink-ESB Message Gateway
 Click on "Gateway Config" tab if not there already, and click "Trigger Instances" button. Confirm a message box by pressing "OK"
Step 4: verifying functionality using curl or browser
 Type curl -k -i https://192.168.2.105:8081/service/country/info/DE command and press "Enter". You should see output as on picture below:

 Trying from the other IPs no error should be thrown, and service should provide a normal response.
Step 5: returning custom HTTP reply code and reply reason
 Every time a request validation rule exception is raised, HTTP 500 error is returned to tha caller. What if you want to return let's say "HTTP 401 Access denied" or some other custom exception message?
 The way to achieve this - is to use a request transformation rule instead of a validation rule.
 Go to Flink-ESB Message Gateway Config Console on the browser and click on "Transformation Rules" tab. Press "Add Entry" button, and type data as on picture below: "Rule Id" : 1003 (or any unique Id), "Rule Type" : RESP_CODE, "Resp. Code" : 401, "Resp. Reason" : 'Access denied', "Resp. Data" : 'This IP is in black list' :
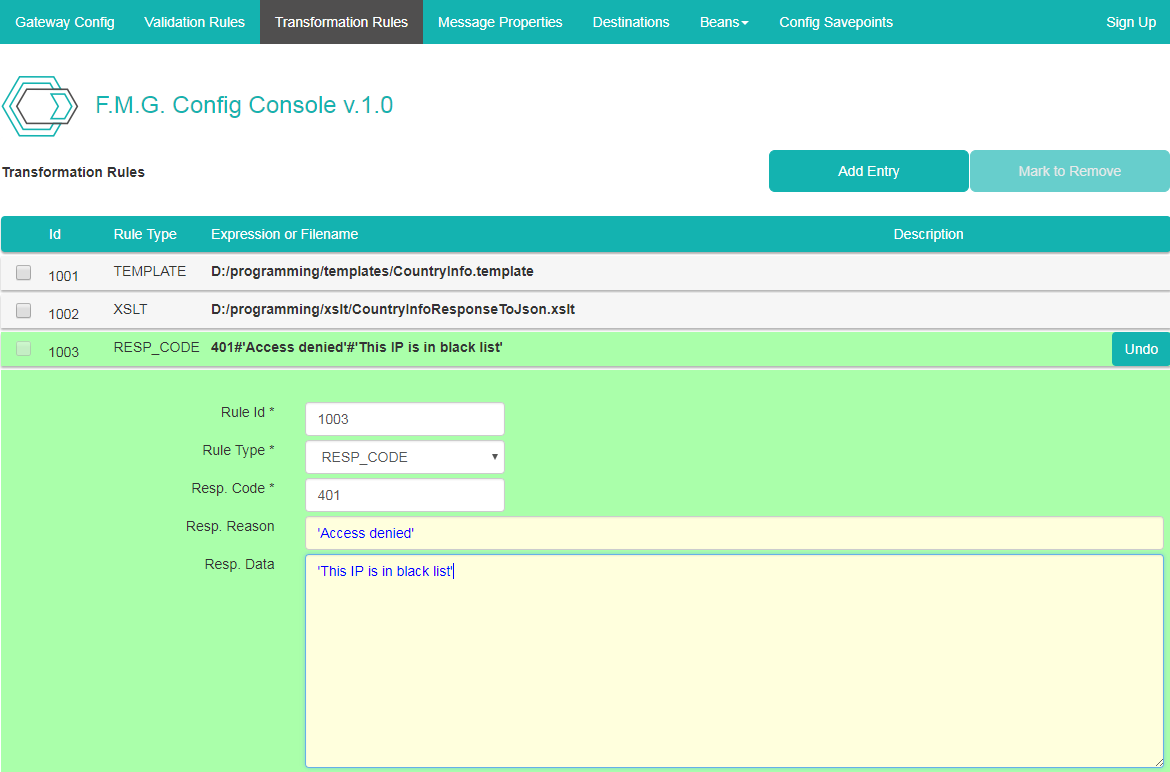
 Now click "Save Modifications" to save changes.
Step 6: assigning request transformation rule to façade entry
 Go to Flink-ESB Message Gateway Config Console on the browser and click on "Gateway Config" tab and click on the row with "Config Id" 1001 (or whatever Id you've assigned to façade entry with URI /service/country/info/{country}) to unhide details panel.
 Click on "Edit Request Validation Rules" link and unselect a checkbox on the left side of rule with Id 1001 (or whatever Id you've assigned to a validation rule in step 1), The row changes colour to light red, meaning it is "marked to be deleted":
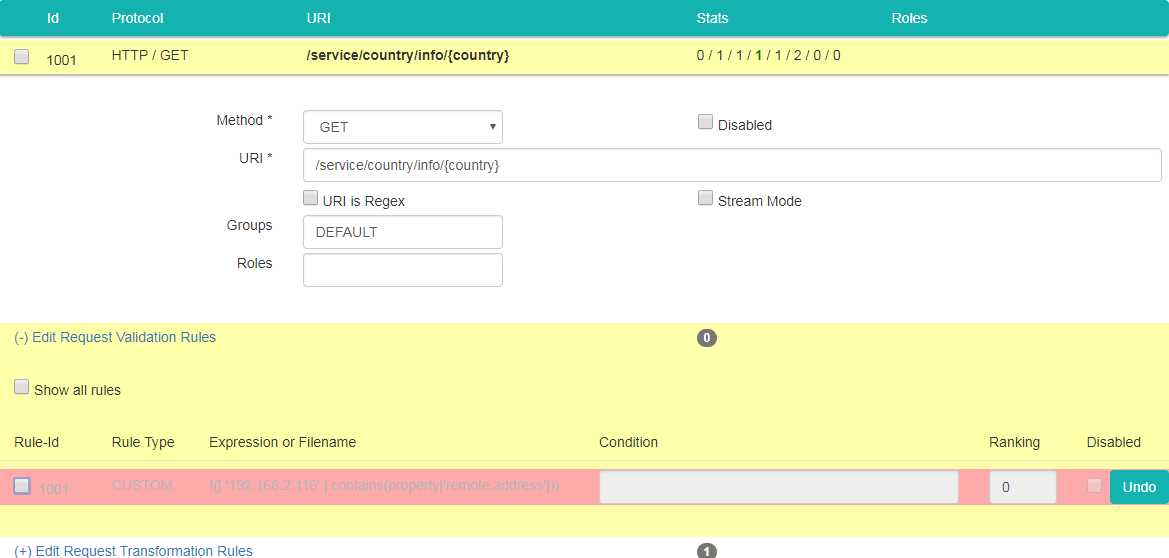
 Click on "Edit Request Validation Rules" link again to hide its details panel. Now click on "Edit Request Transformation Rules" link, select "Show all rules" checkbox and select a checkbox on the left side of rule with Id 1003 (or whatever Id you've assigned to a rule returning HTTP 401).
 Type following expression in "Condition" field: ['192.168.2.116'].contains(property['remote.address']). Type 5 as the value of "Ranking" field. This puts this rule in front (meaning: it is checked first) of another rule with Id 1001, which is also assigned to that façade entry already. The data should look like on picture below:
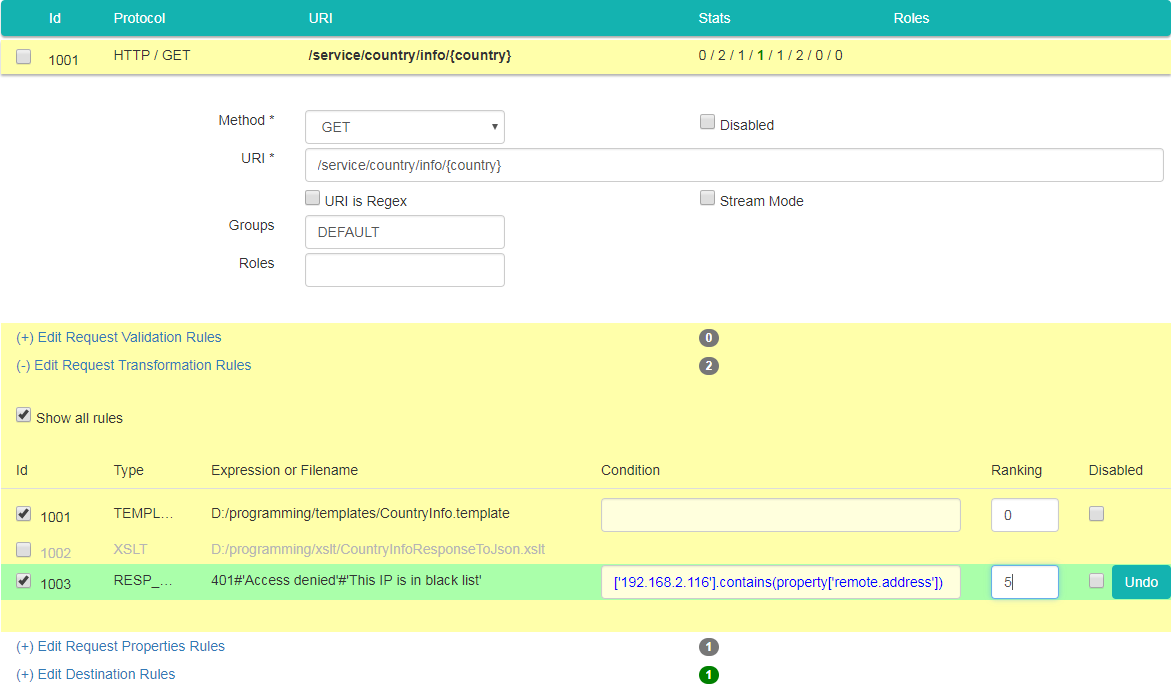
 Now click "Save Modifications" to save changes and after that click "Trigger Instances" to activate configuration changes.
Step 7: verifying functionality using curl or browser
 Type curl -k -i https://192.168.2.105:8081/service/country/info/DE command and press "Enter". This time you should see output as on picture below:

 Trying from the other IPs, no error is thrown, and service provides a normal response:
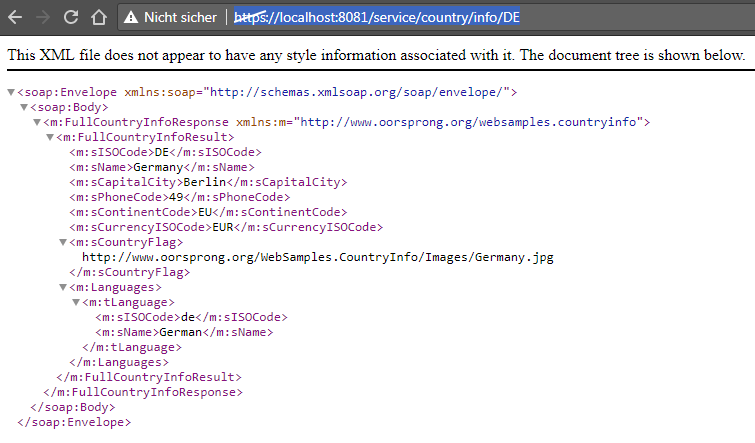
 Go ahead and try different HTTP response codes / response reasons / response data.
Step 8: adding a white list to protect a service
 Let's create another request transformation rule, returning a different error, in case requestor's IP is not in the white list. Repeat the steps performed in step 5. Provide following data for the new transformation rule: "Rule Id" : 1004 (or any unique Id), "Rule Type" : RESP_CODE, "Resp. Code" : 403. Leave "Resp. Reason" and "Resp. Data" empty:
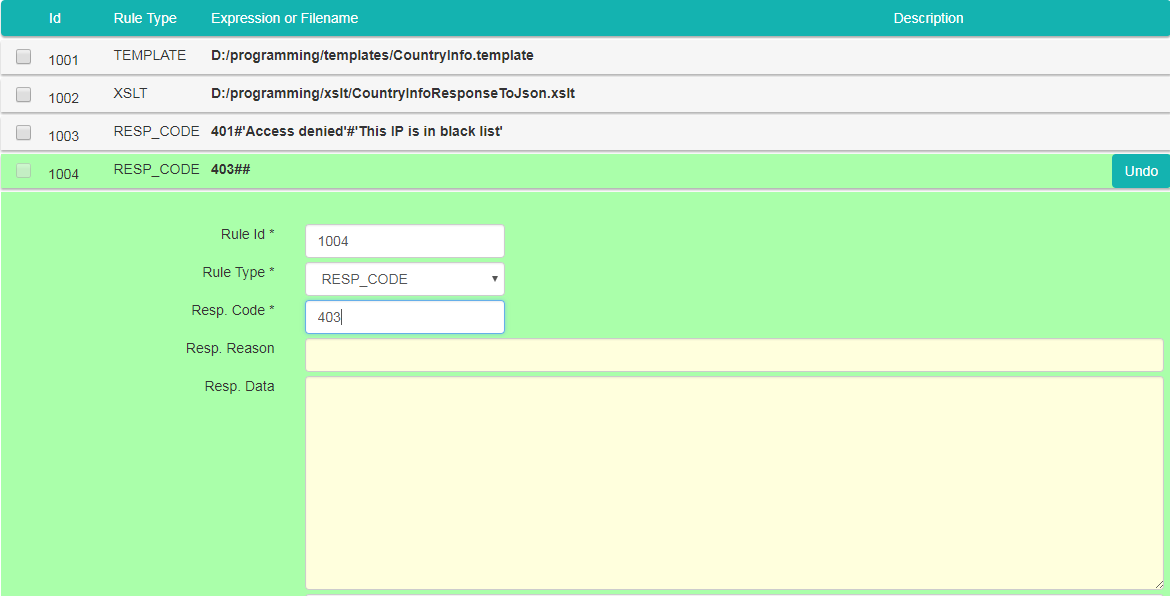
 Click "Save Modifications" and then go to "Gateway Config" tab and click on the row with "Config Id" 1001 (or whatever Id you've assigned to façade entry with URI /service/country/info/{country}) to unhide details panel.
 Click on "Edit Request Transformation Rules" link, select "Show all rules" checkbox and select a checkbox on the left side of rule with Id 1004 (or whatever Id you've assigned to a rule returning HTTP 403).
 Type following expression in "Condition" field: !(['127.0.0.1','192.168.2.105'].contains(property['remote.address'])). Type 3 as the value of "Ranking" field, so that a black list rule is applied first:
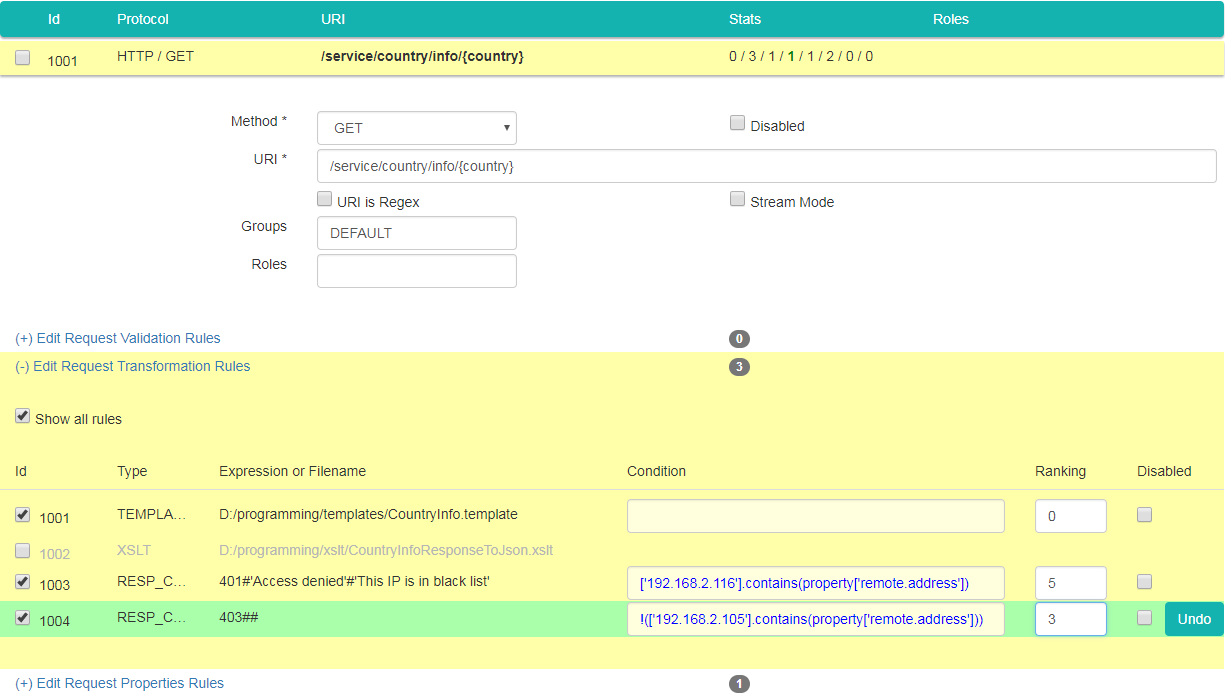
 Now click "Save Modifications" to save changes and after that click "Trigger Instances" to activate configuration changes.
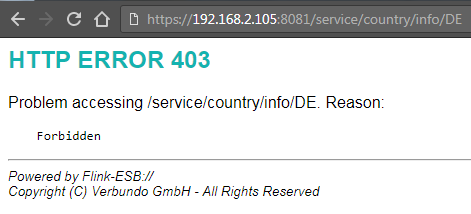
 Now a service is available only from machines specified in the white list. Calls from IPs in the black list get "HTTP 401 Access denied" error. All other callers should get "HTTP 403 Forbidden":
 !!! You should never configure IP addresses, or any other environment specific values explicitly in config console. !!! Use always project variables to be flexible !!! To do that, just replace any part, which is environment specific with ${projectvar.name}.
 For this tutorial, you could replace, for example, ['192.168.2.116'] with ${blacklist.ips} within "Condition" field of the rule returning HTTP 401, and ['127.0.0.1', '192.168.2.105'] with ${whitelist.ips} within "Condition" field of the rule returning HTTP 403.
 Then you would also need to add 2 variables to a file called "appconf/message.gateway.cfg" (path is relative to installation path of Flink-ESB Message Gateway) in this form:
blacklist.ips=['192.168.2.116']
whitelist.ips=['127.0.0.1', '192.168.2.105']
